How to Choose a Solar Pillar Light 7 Tips?

Time:2026-11-08 Author:Amelia
0%

Choosing a Solar Pillar Light involves more than matching a fixture to your gate or garden wall. A bright product photo cannot tell you how long its battery will last after a cloudy afternoon. Nor does a high lumen rating guarantee useful light across a path. This guide offers seven practical tips for comparing the details that matter: sunlight exposure, panel design, battery capacity, brightness, color temperature, weather resistance, and installation. Small differences count. A shaded pillar may need a separate panel, while a broad stone entrance may benefit from warm, evenly spread light rather than a sharp beam.

Dr. Steven Chu, a Nobel Prize-winning physicist and former U.S. energy secretary, is often quoted as saying, “The sun is the only safe nuclear reactor, situated as it is some 93 million miles away.” His observation speaks to solar energy’s source, not to the performance of any particular pillar light. That distinction matters. Product claims still need checking against specifications, warranty terms, and realistic site conditions. Look for clear information about charging time and expected runtime, and consider whether the panel receives direct sun for much of the day. Seven tips can make the choice easier, though they cannot replace observing your own space. Even a well-reviewed light may disappoint in deep shade. That is worth remembering.
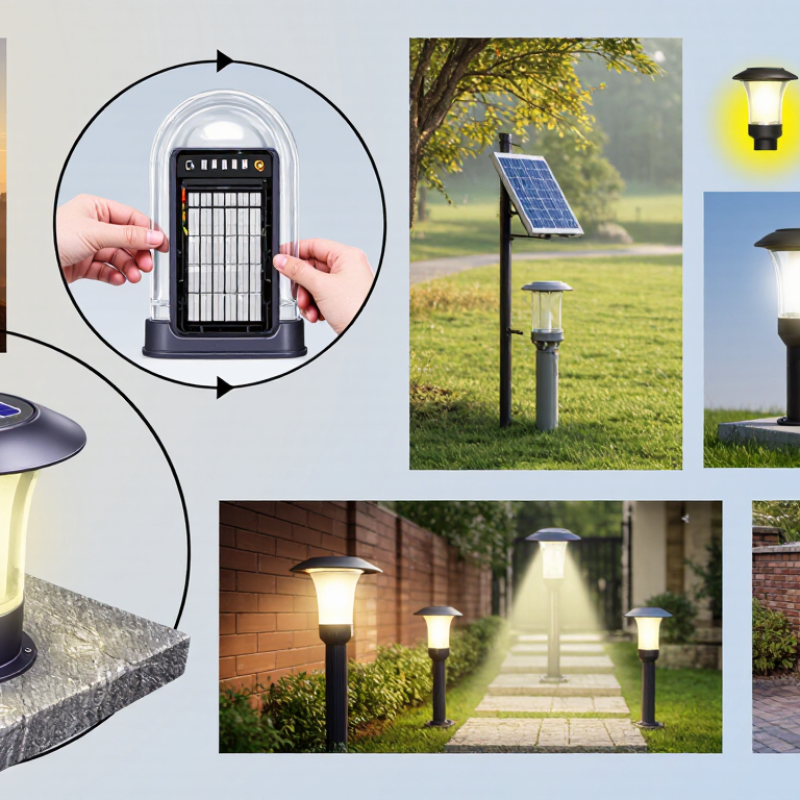
How to Choose a Solar Pillar Light 7 Tips?

Define the Lighting Need: Compare Lumens, Beam Angle, and 2700–4000 K CCT

Choose the lighting need before comparing solar pillar lights. A gatepost marker needs less light than steps beside a dark path. The U.S. Department of Energy’s Lighting Facts guidance distinguishes lumens, watts, and correlated color temperature (CCT). Lumens describe light output; watts describe power use. ENERGY STAR’s brightness guide uses 800 lumens as a familiar comparison for a traditional 60-watt bulb, but that is only a reference point, not a target for every pillar. Too much output can create glare on nearby paving.

Beam angle decides where those lumens go. A narrow beam can highlight a column or address plaque, while a wider beam spreads light across a walkway. Check the fixture’s distribution diagram if available; the angle alone may not show how evenly light reaches the ground. For color, 2700–3000 K gives a warmer, softer look near a home entrance. Around 4000 K appears cooler and can make edges easier to distinguish, though it may feel stark in a small garden. A practical choice is often between those extremes. I still find color easy to misjudge from product photos. Compare samples outdoors, and remember shade and short winter days can reduce a solar light’s performance.

Check Weather Protection: IEC 60529 Defines IP65 as Dust-Tight and Water-Jet Protected

Solar pillar lights sit where rain, dust, and garden debris can reach them. IEC 60529 gives IP65 a clear meaning: the first digit, 6, indicates a dust-tight enclosure; the second, 5, indicates protection against water jets. That matters. It does not mean the light can be submerged.

When comparing lights, check that the IP65 rating applies to the complete assembled unit, including its battery compartment and cable entry points. A well-sealed housing can still be let down by a loose cover or damaged gasket. Look for a rating on the product documentation, not just a vague claim such as “weather resistant.” If a fitting will face a sprinkler, consider its direction and distance. IPX5 covers specified water-jet tests, not every possible spray or pressure-washer situation.

Installation affects real-world protection, too. Keep the light upright as instructed, and avoid placing it where water routinely pools around the base. Inspect seals after seasonal cleaning or battery access. A rating is useful, but it cannot guarantee careful assembly or long-term maintenance. Still, the label can make the choice seem simpler than it is; check the construction and intended placement together.

Size the Solar System: Compare Panel Watts, Battery Wh, and Rated Nightly Runtime

Start with energy, not the panel’s headline wattage. Multiply the light’s draw by its target nightly hours: a 2 W LED running for 10 hours uses 20 Wh, before system losses. Compare this with the battery’s usable energy, not only its label capacity. For example, a 3.2 V, 6 Ah battery stores about 19 Wh nominally. The usable amount may be lower because of discharge limits, cold nights, and aging. Close, but not comfortably sized. Rated runtime is an estimate, not a promise.

Next, check whether the panel can replace that energy during an average day. A 4 W panel receiving four peak-sun hours produces 16 Wh before losses, less than the example light needs. The National Renewable Energy Laboratory’s PVWatts documentation applies a 14% default system-loss assumption to modeled solar systems. Treat that as a useful reminder, not an exact adjustment for a small light. Shade, panel angle, and cloudy weather can reduce charging further. Check cloudy weeks. Compare panel watts, battery Wh, and runtime under the same conditions; manufacturers may test runtime with a fully charged battery and reduced brightness. That detail is easy to miss.

Assess Battery Life: Check Manufacturer-Rated Capacity and Charge-Cycle Data

A solar pillar light can look bright in the shop and still fade before midnight. Check the battery’s rated capacity, usually listed in milliamp-hours (mAh) or watt-hours (Wh). Wh makes comparisons easier when battery voltage differs. A larger number is not automatically better; the light’s power draw and control settings matter too. Look for the battery type and whether the capacity refers to a new battery under stated test conditions. Small details count.

Next, review the stated charge-cycle life. A cycle generally means one full charge and discharge, though manufacturers may use different test methods. Prefer specifications that explain the test temperature, discharge depth, and capacity remaining at the end of testing. “Hundreds of cycles” is less useful without those details. Also check whether the maker describes expected performance after aging, not just initial runtime. Real conditions vary.

Compare the rated capacity with the advertised operating hours, but treat runtime as an estimate. Shade, winter sunlight, cold nights, and frequent motion-triggered brightness can change how long the lamp stays lit. A useful specification might state runtime at a particular brightness level after a full charge. If that information is missing, ask the seller or treat the claim cautiously. I would not choose by battery size alone; even a strong battery cannot make up for poor charging exposure. Inspect whether the battery is replaceable, too. That practical detail is easy to overlook until the light begins dimming.

Review Light Safety: Check Photobiological Risk Ratings under IEC 62471

How to Choose a Solar Pillar Light: 7 Tips

A solar pillar light sits close to eye level on many paths, gates, and patios. Its brightness matters, but so does how its light affects the eyes. Check the product documentation for a photobiological safety assessment under IEC 62471. This standard classifies potential risk from optical radiation, including light from LEDs. Look for the stated risk group and the distance used during testing. A rating without measurement details tells only part of the story.

Risk groups range from RG0, the Exempt Group, to RG3, the highest-risk group. For ordinary outdoor lighting, a lower group is generally preferable, but context matters. The rating depends on the tested light, viewing distance, and exposure conditions. Don’t assume that every light with a low-risk rating is safe to stare into at close range. I would also check whether the report applies to the exact light source, not just a similar component. Paperwork can be hard to interpret.

Tips: Ask the seller for the IEC 62471 test information. Compare ratings at the stated distance, and choose a fixture that can be mounted above direct eye level. Check the diffuser, too: a well-covered LED can reduce glare. If the details are missing, pause and ask. That’s a useful check.

How to Choose a Solar Pillar Light: 7 Tips — Review Light Safety: Check Photobiological Risk Ratings under IEC 62471
Tip What to Check Useful Information Practical Buying Check
1. Review photobiological safety Look for an IEC 62471 assessment or risk-group information for the lamp or LED light source. IEC 62471 classifies photobiological risk as Exempt Group (RG0), Risk Group 1 (RG1), Risk Group 2 (RG2), or Risk Group 3 (RG3). The assessment considers exposure conditions; a risk group should be read together with its stated measurement distance and viewing conditions. Ask for the test report or safety documentation if the risk group is not provided. Do not assume that a particular LED color or brightness alone establishes its risk group.
2. Check brightness and beam direction Compare the stated light output in lumens, beam spread, and whether the LEDs are directly visible at eye level. Lumens describe total visible light output, not how bright the light will appear from every direction. A diffuser or shield can help reduce direct glare, while a narrowly directed beam can create bright spots. Choose output suited to the path, entrance, or boundary being lit. Prefer a design that directs light where needed rather than shining into eyes or neighboring windows.
3. Assess the solar charging location Check the panel type, panel position, and the amount of direct sunlight available at the installation site. Shade, shorter winter days, cloudy weather, dirt on the panel, and panel orientation can reduce charging. A light’s actual runtime can therefore vary with season and location. Confirm that the panel can receive unobstructed daylight. If the panel is built into the fixture, check that the whole light can be positioned in a sunny spot.
4. Compare runtime claims carefully Review the stated operating time, battery capacity, brightness modes, and any motion-sensor settings. Runtime depends on charge received and power used. A long runtime quoted for a dim mode may not apply at full brightness, and motion-activated operation can use energy differently from continuous lighting. Look for test conditions behind runtime claims, including light mode and charging conditions. Choose adjustable output if you need to balance brightness and overnight operation.
5. Match weather protection to the site Check the IP rating, which is defined by IEC 60529, and the manufacturer’s installation instructions. For example, IP44 indicates protection against solid objects larger than 1 mm and splashing water; IP65 indicates dust-tight construction and protection against water jets. An IP rating does not by itself establish impact resistance or suitability for every exposure. Use a rating appropriate for the expected rain, dust, and mounting position. Check whether the solar panel, battery compartment, and connectors have the same protection as the fixture.
6. Check battery and maintenance details Find the battery chemistry, capacity, replacement instructions, and availability of spare parts. Rechargeable batteries have a finite service life, and performance can decline with age and repeated use. Cold or hot conditions may also affect battery performance. Prefer clear battery specifications and safe, accessible replacement instructions. Follow the manufacturer’s guidance for battery replacement and disposal.
7. Verify fit, stability, and warranty Measure the pillar or mounting surface and review fixing hardware, fixture dimensions, materials, and warranty terms. Correct fit and secure mounting help reduce the chance of movement or damage in outdoor conditions. Warranty coverage and exclusions vary by product and seller. Check dimensions before ordering, confirm that the supplied fixings suit the mounting surface, and read the warranty conditions for the light, solar panel, and battery.

FAQS

How can I estimate whether a solar pillar light has enough battery capacity?

Multiply the light’s wattage by its expected nightly hours. A 2 W light running for 10 hours needs about 20 Wh, before losses. Compare that figure with usable battery energy, not just the label. Close is not comfortable.

Is battery capacity in watt-hours more useful than milliamp-hours?

Often, yes. Watt-hours make it easier to compare batteries with different voltages. For example, a 3.2 V, 6 Ah battery stores about 19 Wh nominally. Its usable energy may be lower.

Can the solar panel replace the energy used overnight?

Estimate panel output using its wattage and peak-sun hours. A 4 W panel with four peak-sun hours produces about 16 Wh before losses. That may not cover a 20 Wh nightly demand. Shade and clouds matter.

Should I trust the advertised nightly runtime?

Treat runtime as an estimate, not a promise. It may assume a fully charged battery and reduced brightness. Check the tested brightness level and charging conditions. I might miss that detail, too.

What battery details should I check before choosing a light?

Look for the battery type, rated capacity, and whether it can be replaced. Check the stated charge-cycle life and test conditions, including temperature and discharge depth. “Hundreds of cycles” is vague without context.

Why might a solar light fade before midnight?

Winter sunlight, shade, cold nights, and frequent motion-triggered brightness can shorten runtime. An aging battery may also hold less energy. A larger battery alone may not fix poor charging exposure.

What does an IEC 62471 rating tell me?

It describes photobiological risk from optical radiation, including LED light. Check the stated risk group and testing distance. The rating depends on viewing and exposure conditions. Don’t stare into the light.

How can I reduce glare when mounting a solar pillar light?

Mount it above direct eye level when practical, and check whether the LED has a diffuser. Ask for test details if the safety information is unclear. Paperwork can be hard to interpret.

Conclusion

Choosing a Solar Pillar Light starts with defining the area and the kind of illumination you need. Compare lumen output for brightness, beam angle for light coverage, and color temperature between 2700 K and 4000 K for a warm-to-neutral appearance. For outdoor use, check the ingress protection rating: under IEC 60529, IP65 indicates dust-tight protection and protection against water jets. These details help you judge whether the light suits its location and intended purpose.

Next, assess whether the solar system can meet your nightly needs. Compare the panel’s wattage, battery capacity in watt-hours, and the manufacturer’s rated runtime after a full charge. Review stated battery capacity and charge-cycle data to understand expected service life, and consider whether local sunlight conditions are likely to support regular charging. Finally, check the light’s photobiological risk information under IEC 62471. Looking at these specifications together makes it easier to choose a light that balances brightness, weather protection, operating time, durability, and safe use.


Amelia

Amelia

Amelia is a seasoned marketing professional with a wealth of expertise in our company’s core offerings. With an unwavering passion for driving growth and innovation, she plays a pivotal role in shaping our marketing strategies and enhancing brand visibility. A key aspect of her responsibilities......